
Overview
The existing shed at Talbot Gardens permaculture garden had reached the end of its life — completely rotten inside, with roof, walls and floor all needing replacement. It was so structurally unsound that it had been kept standing only by a broken cherry tree branch propping it up from outside.
Rather than simply replacing like for like, this design asked: what else could this structure become? The garden had always wanted a greenhouse but also needed a shed. Could we design one structure that serves both purposes — and more?
Methodology
A relatively simple, well-defined design brief — replacing and upgrading an existing structure — suited the lighter CEAP methodology well. SADIM would have been unnecessarily elaborate here.
Working Through the Design
-
1
Collect — Brief & Site Information
I interviewed my parents (the garden owners) about their needs and layered in my own requirements. The brief was distilled into must-haves and would-also-likes. Security was a special consideration: the shed had been broken into multiple times, so valuable items would not be stored there regardless of design.
Must have: Storage space; Greenhouse. Would also like: Teaching space; Outdoor cooking; Seating area.
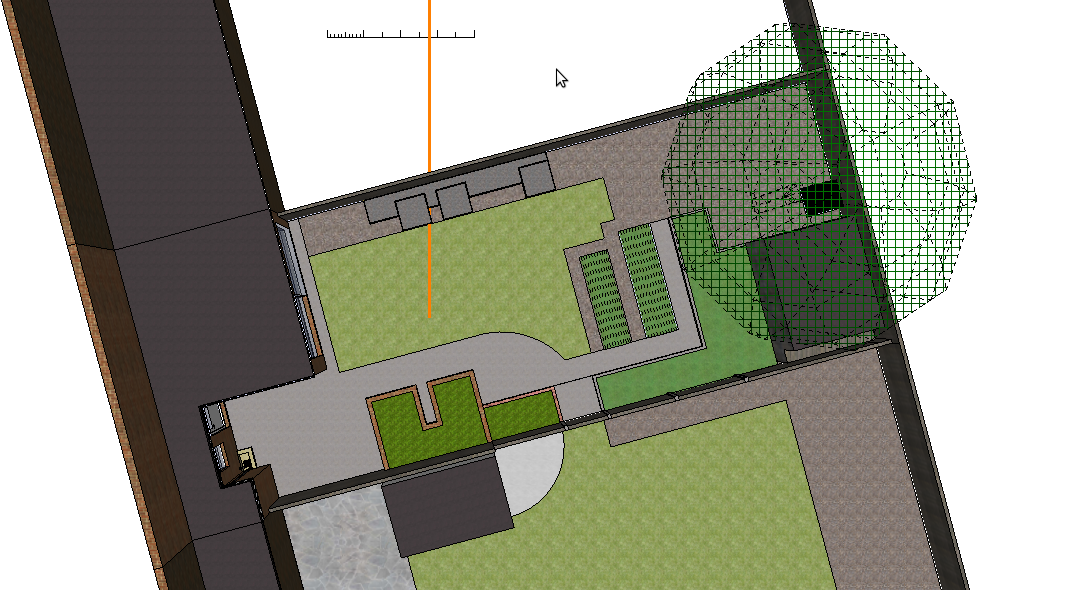
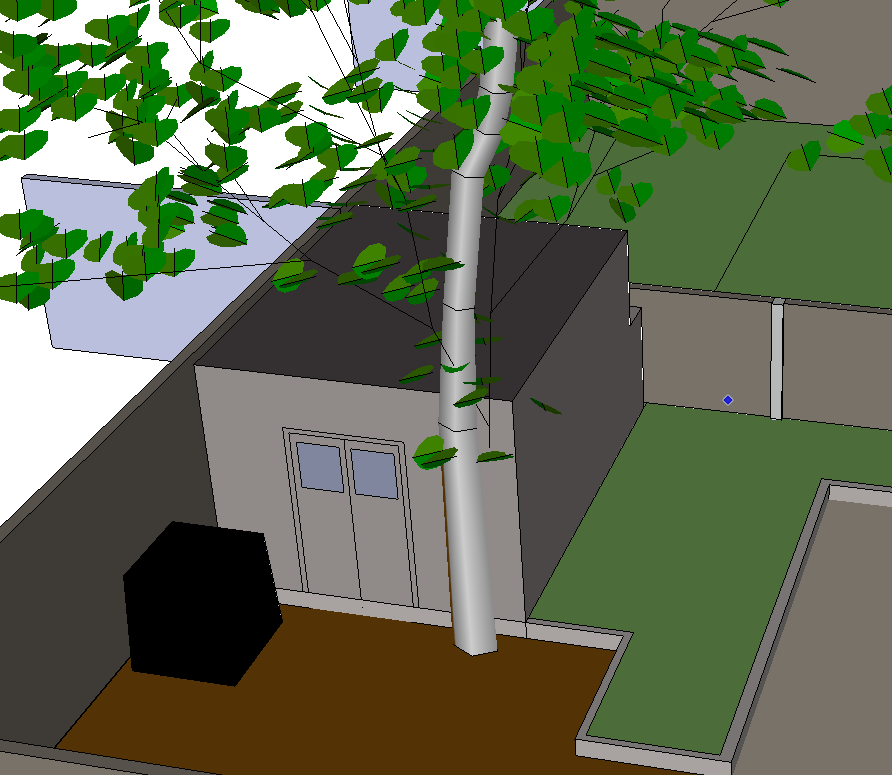
The shed sits at the back of the garden beneath the cherry tree — its position determines orientation, light availability, and interaction with the tree.

-
2
Evaluate — Elements & Ethics Analysis
An input/output elements analysis considered what each intended element needs and produces. The permaculture ethics were applied at every point to guide decisions — particularly around material choices (recycled where possible) and energy use.
A design web analysis identified new elements to add: Solar PV, expanded garden connection, a composting integration, and maximising solar gain.
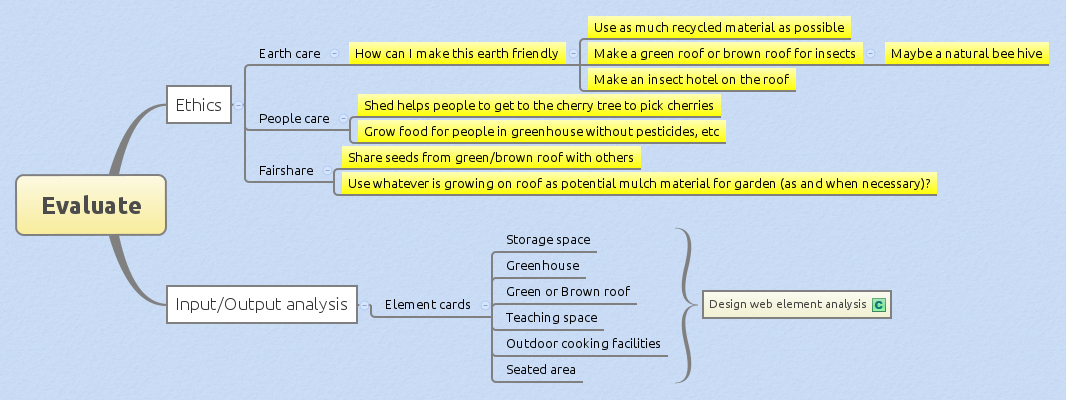
Ethics and elements evaluation mind map 
Design web — needs and surpluses of each element -
3
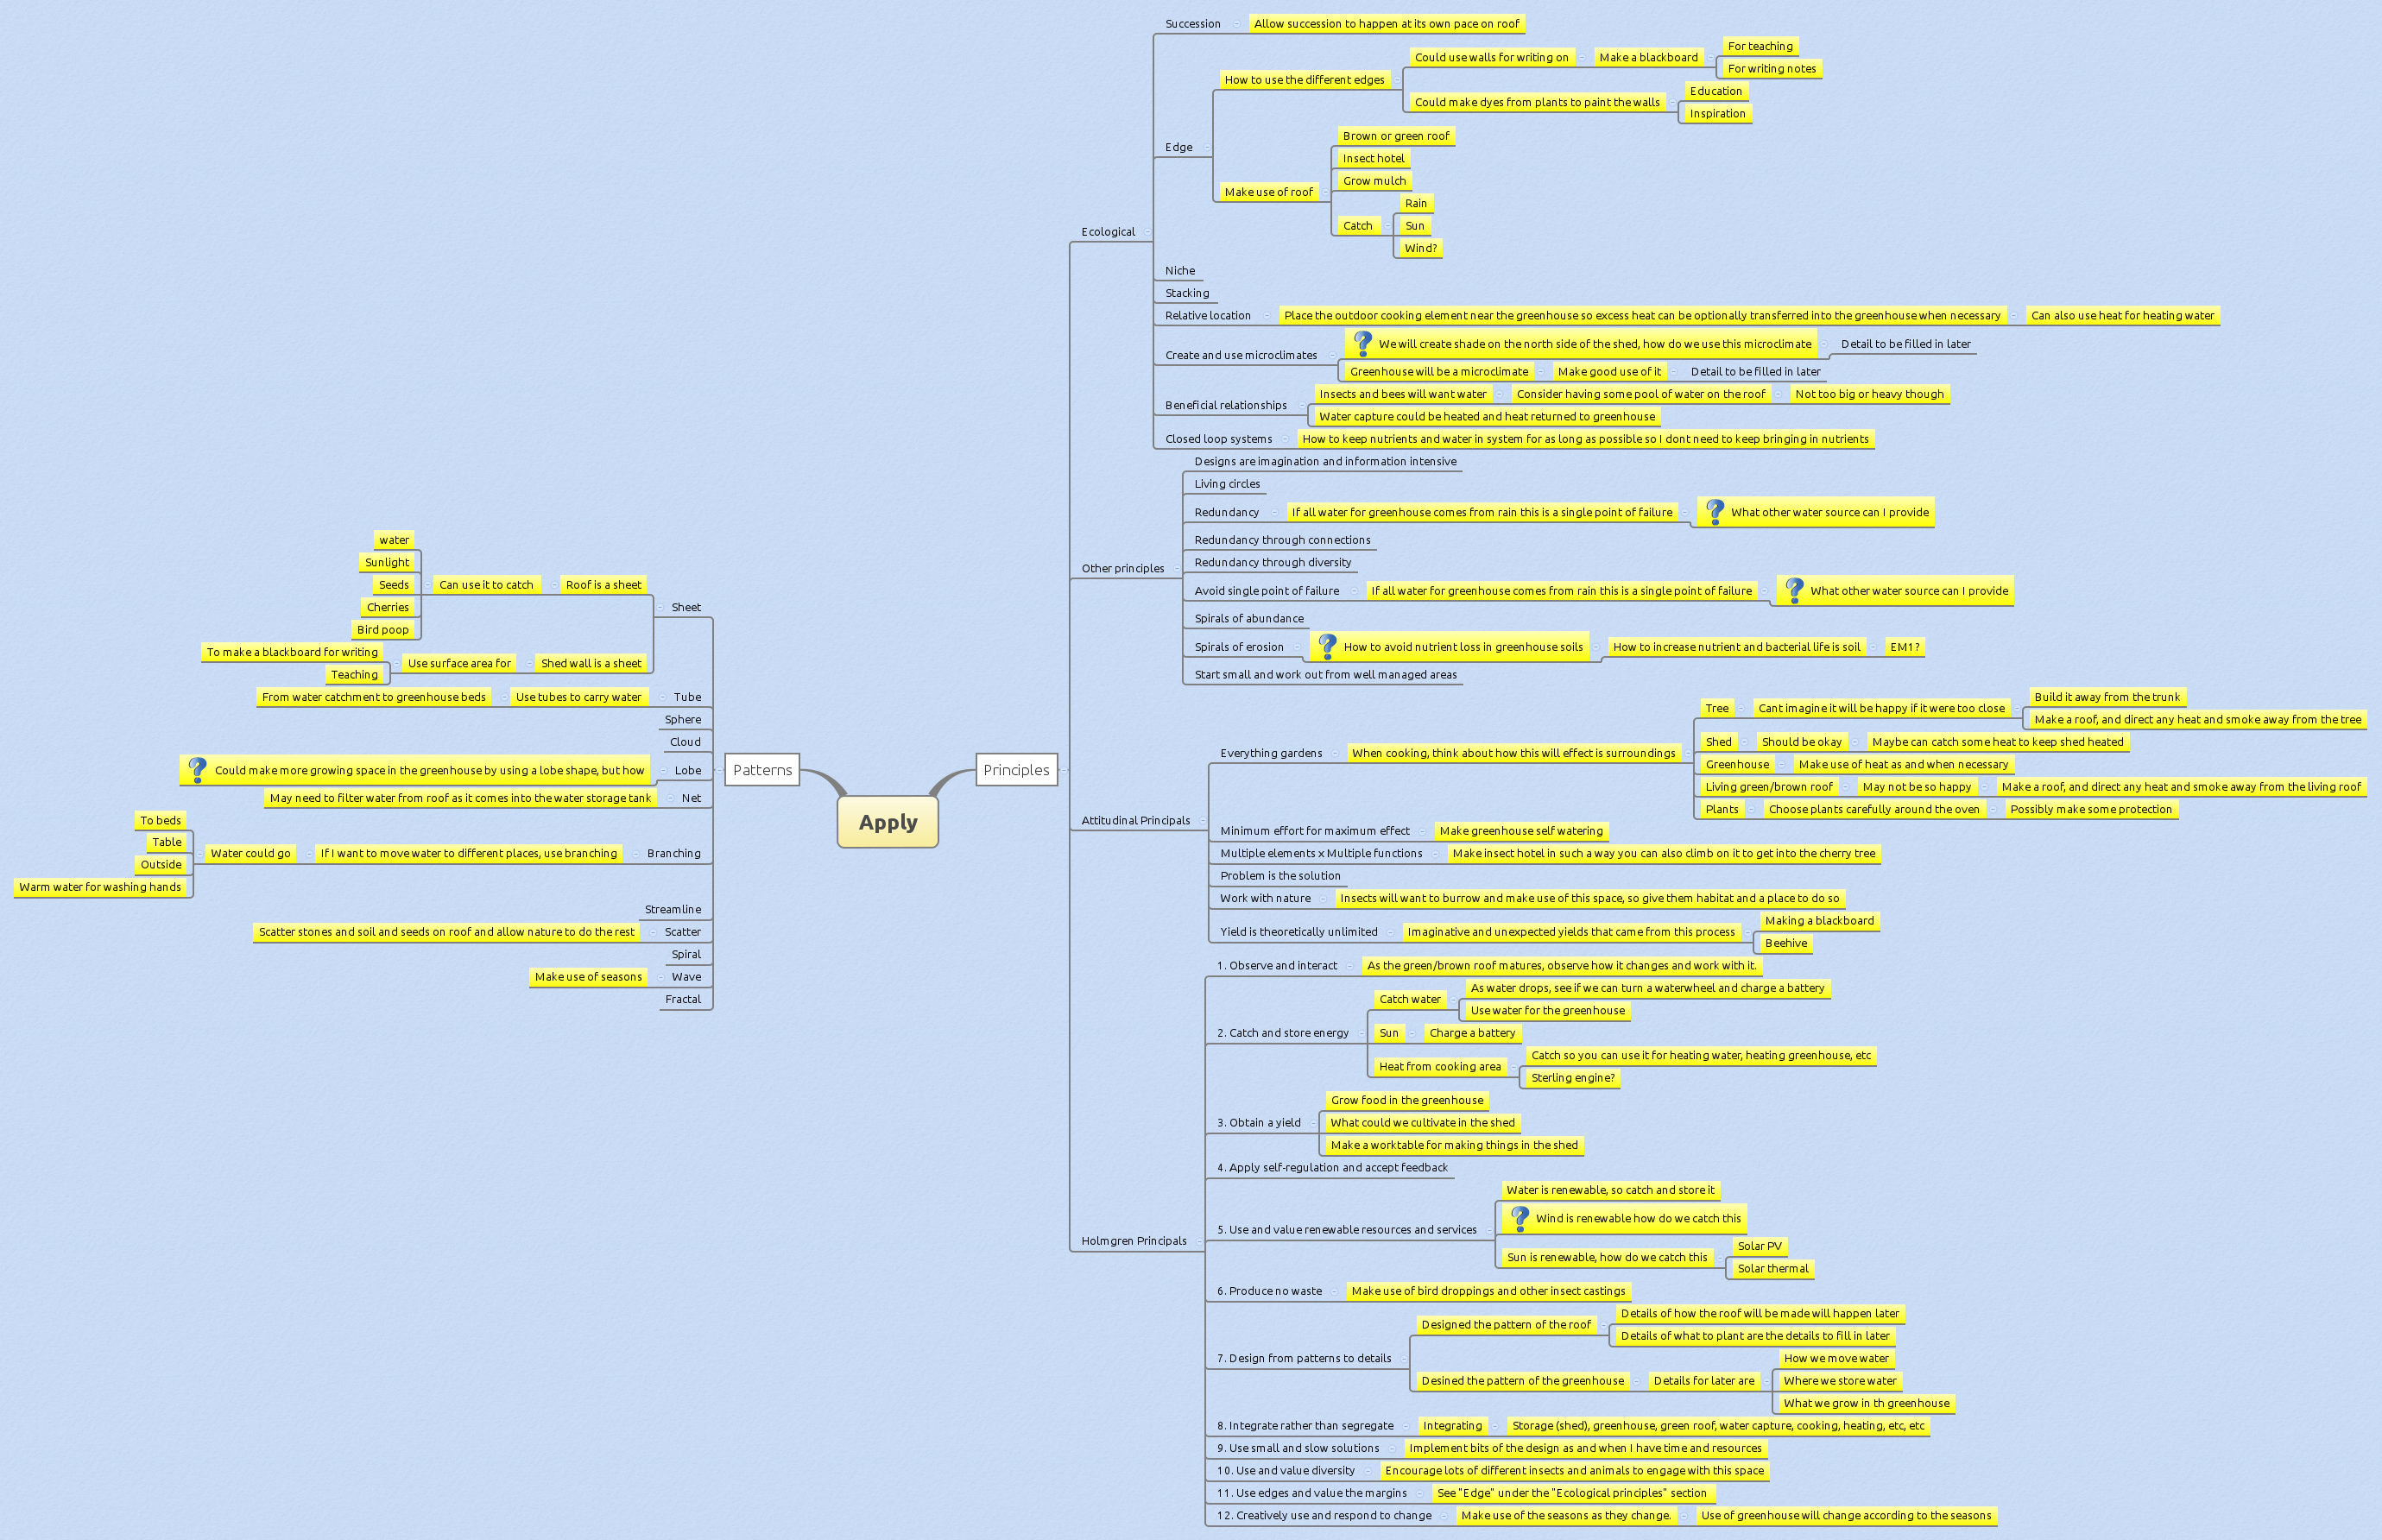
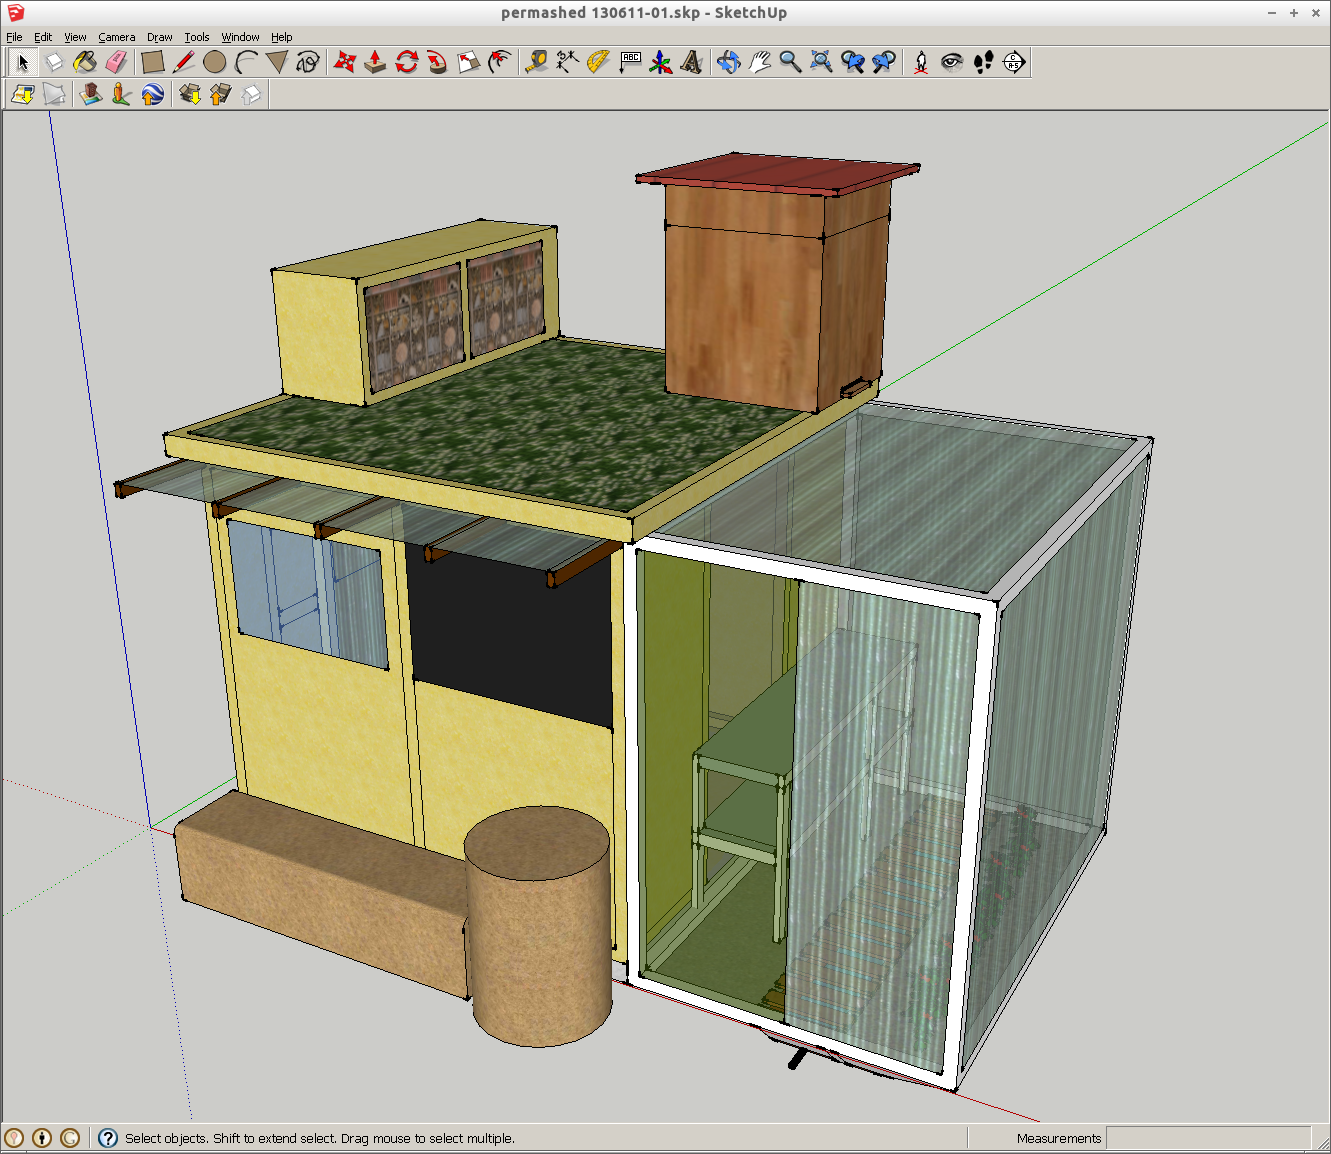
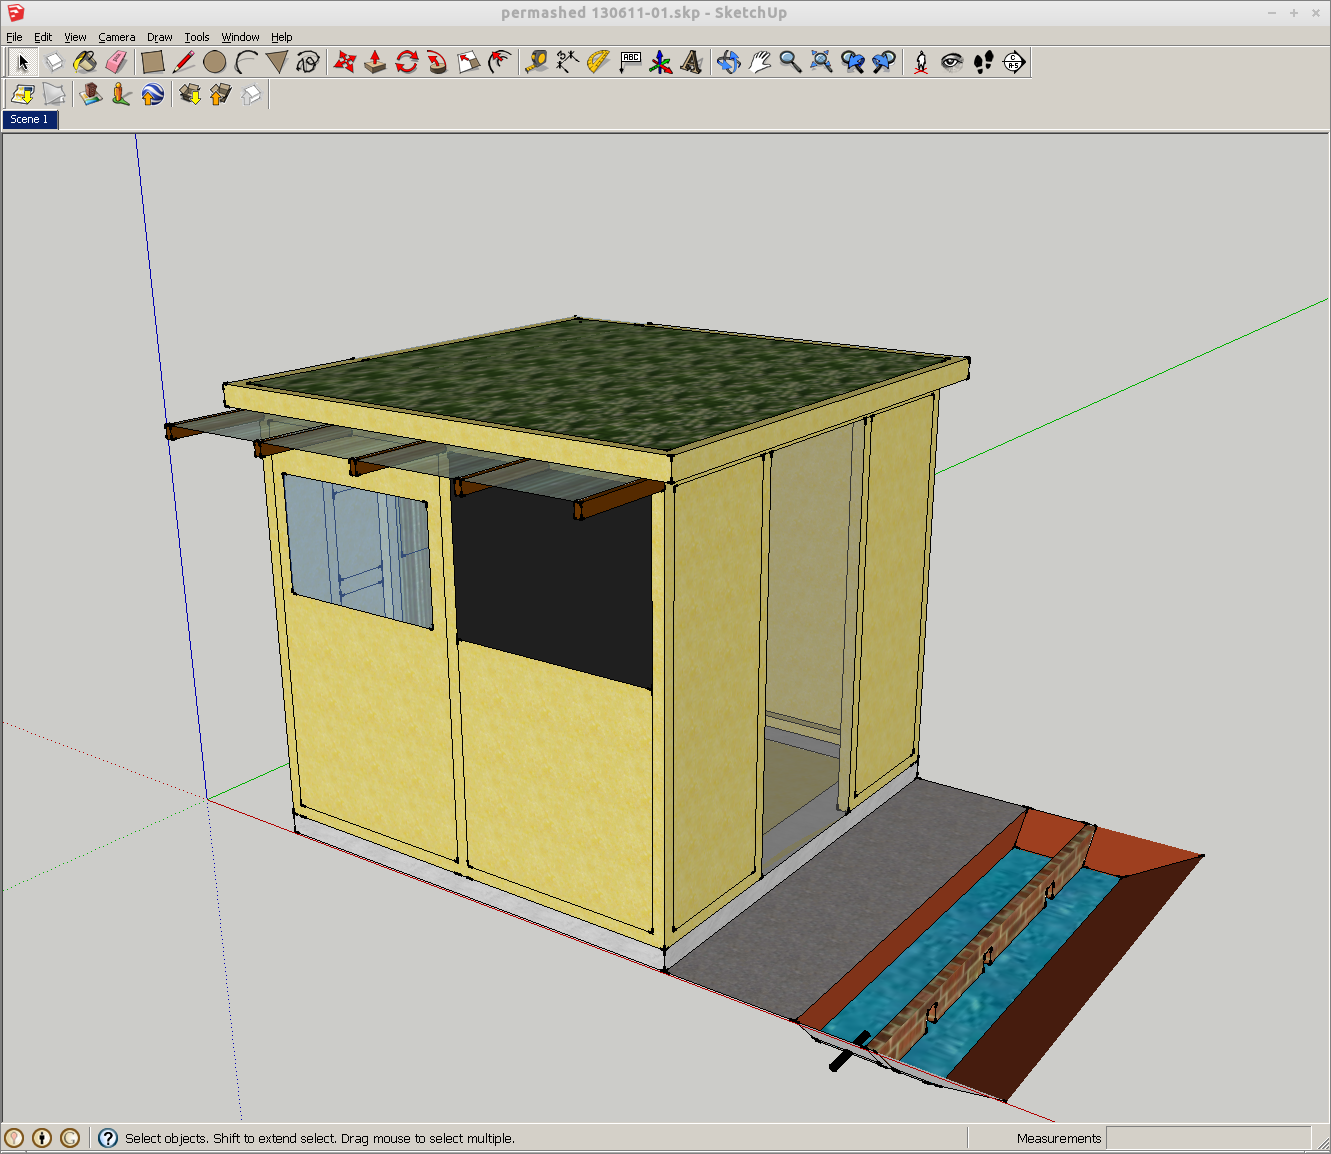
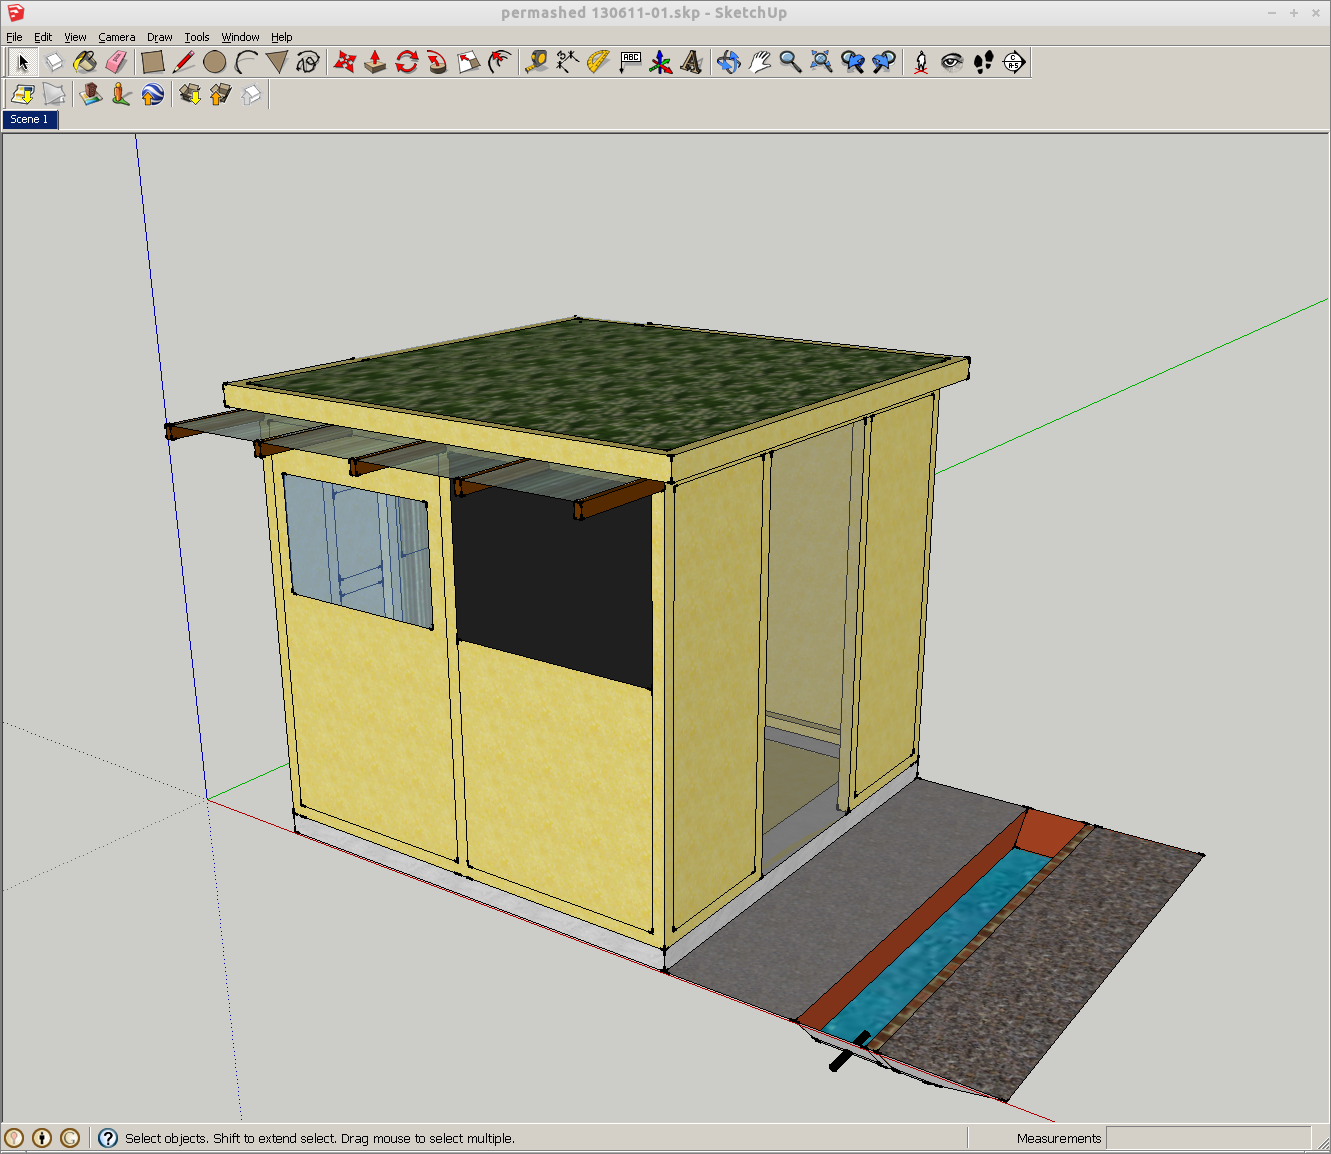
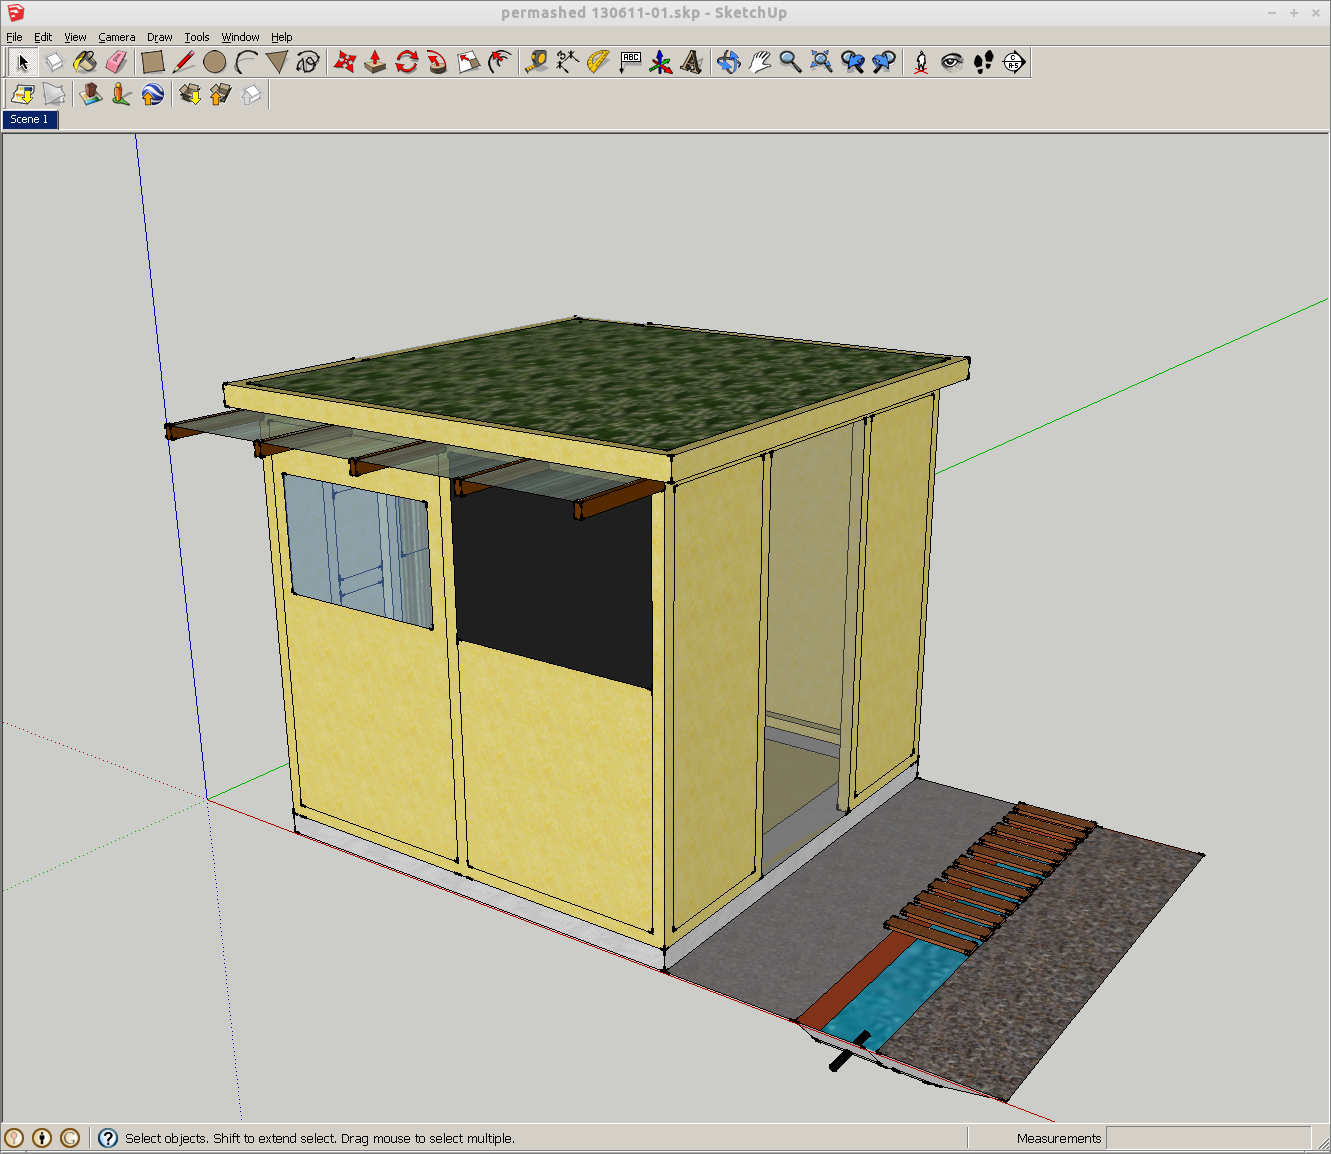
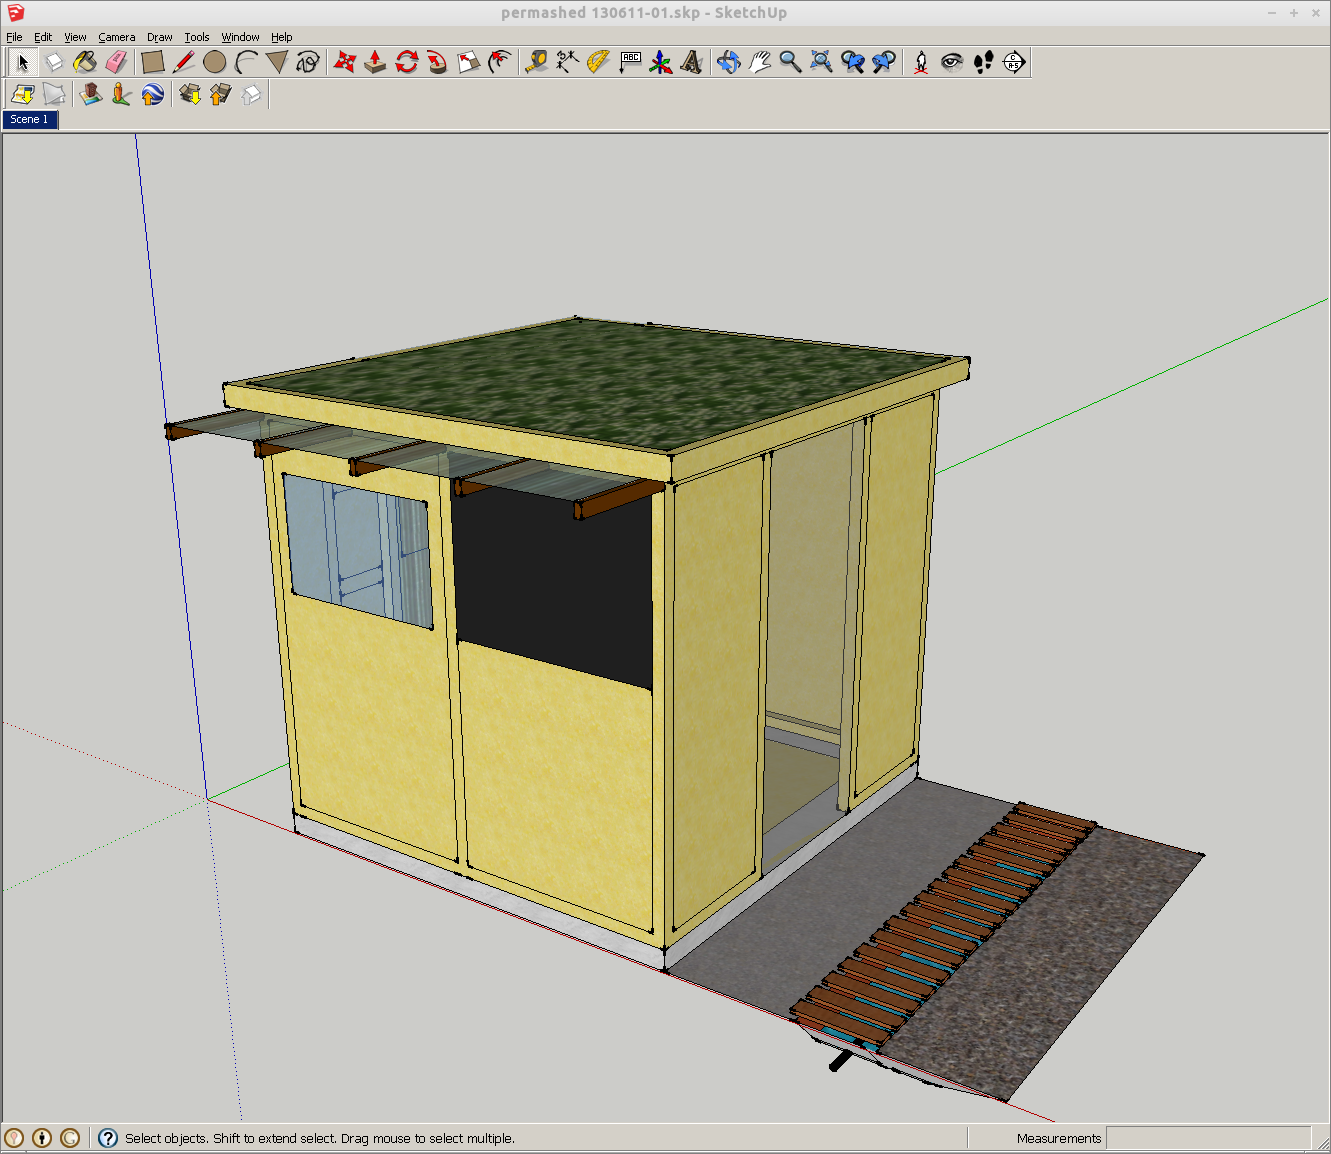
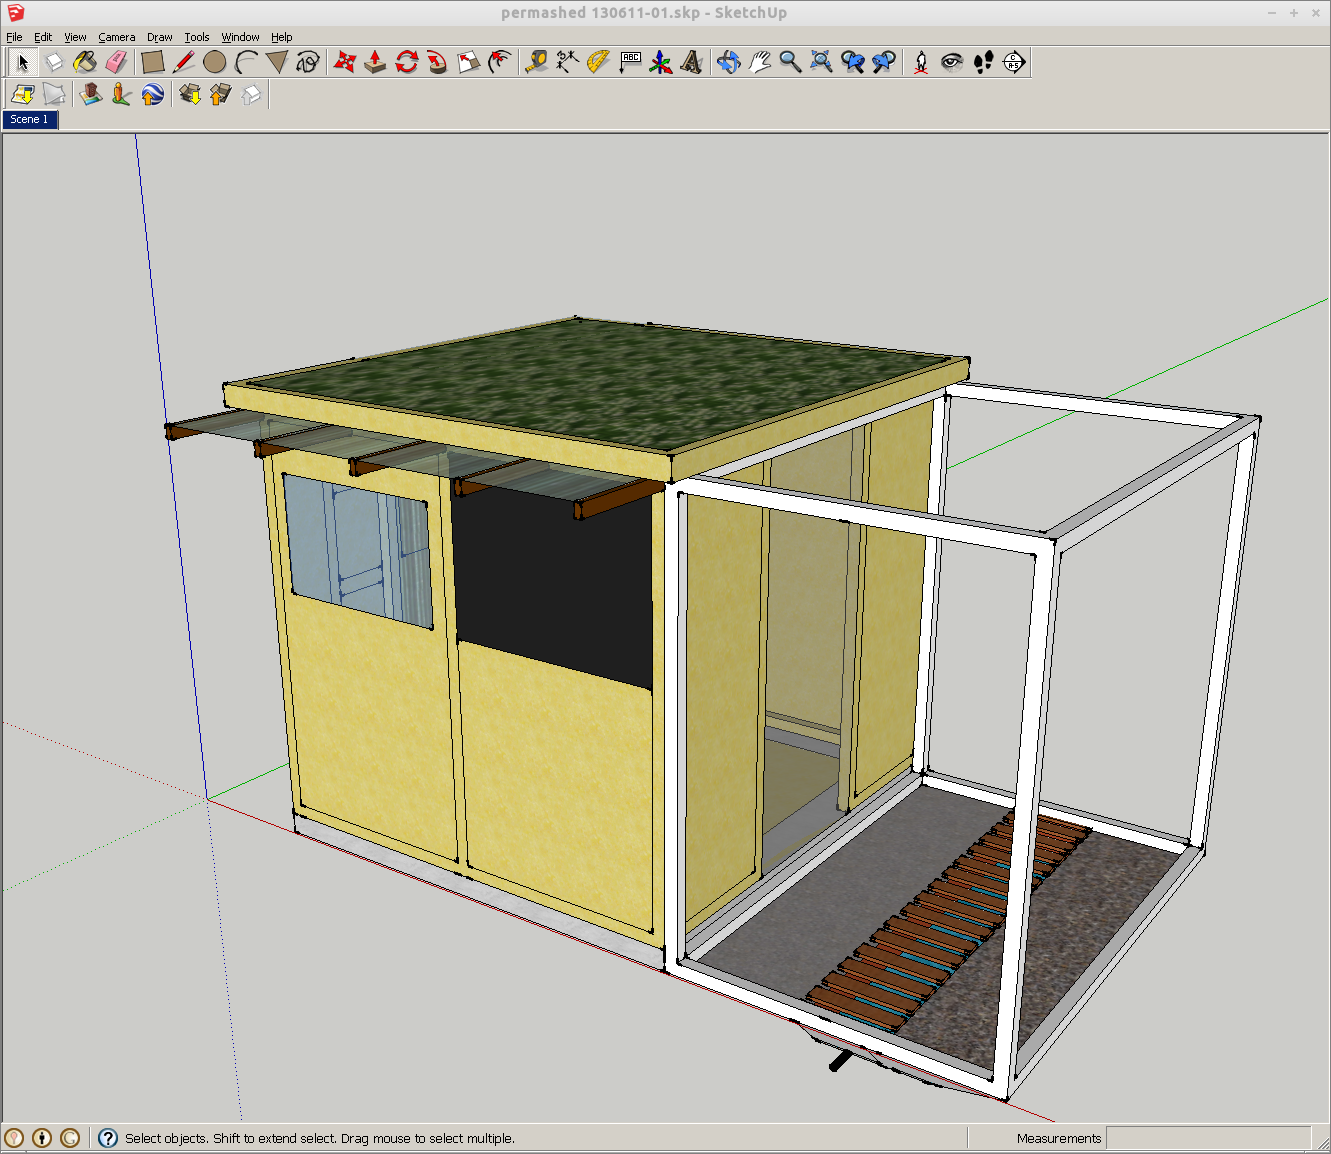
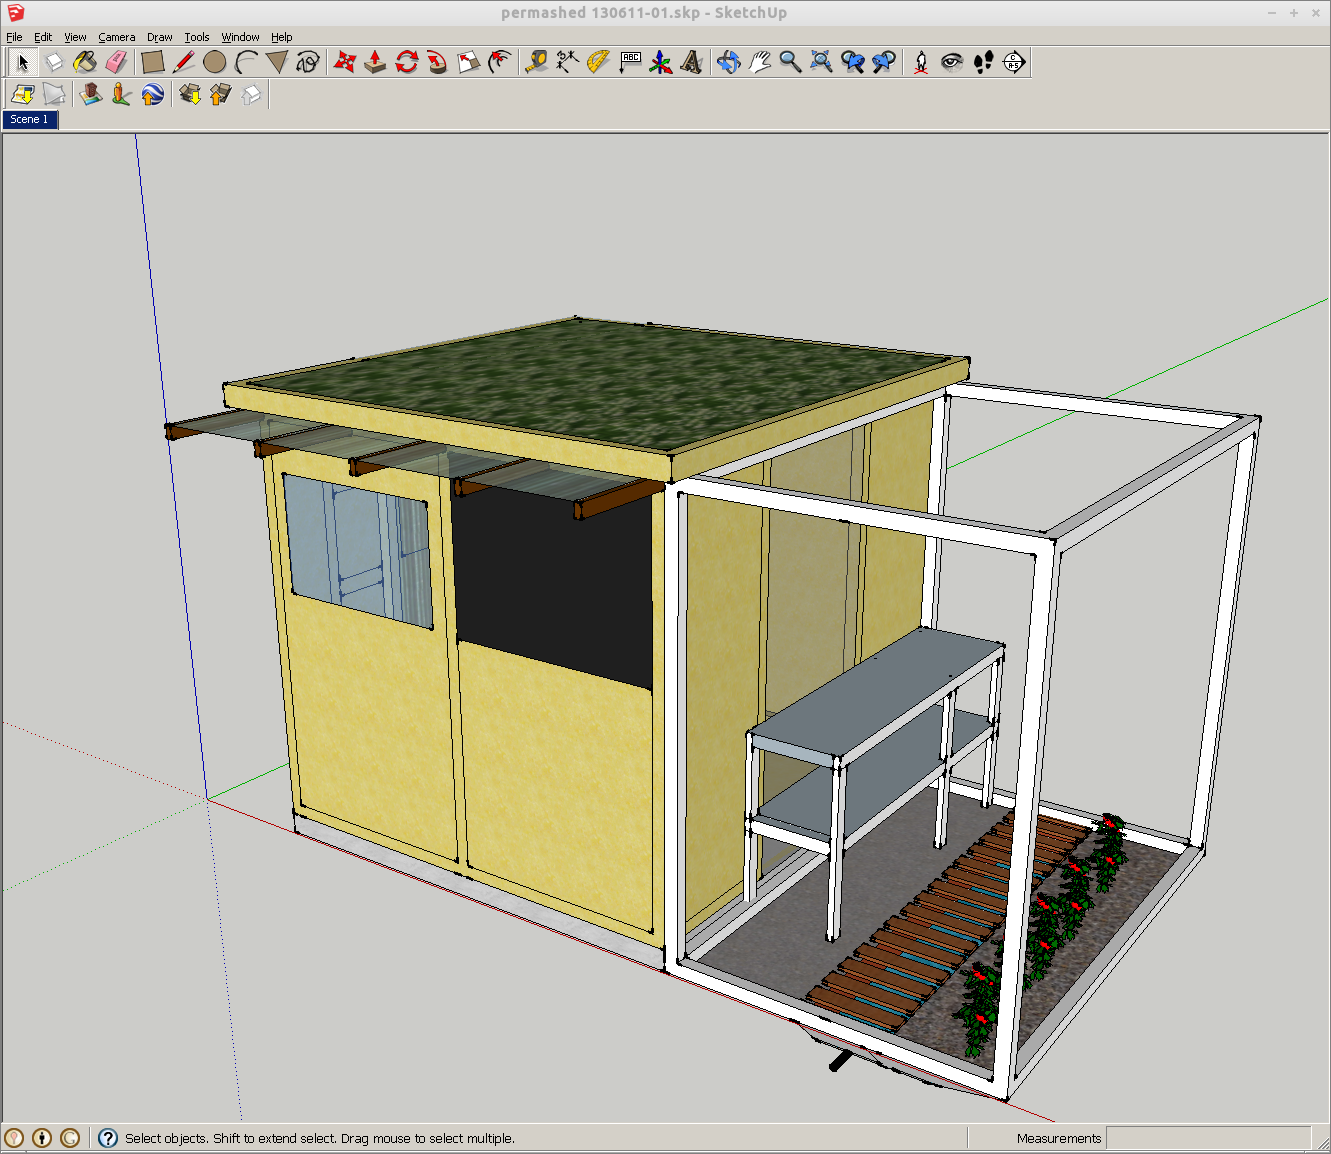
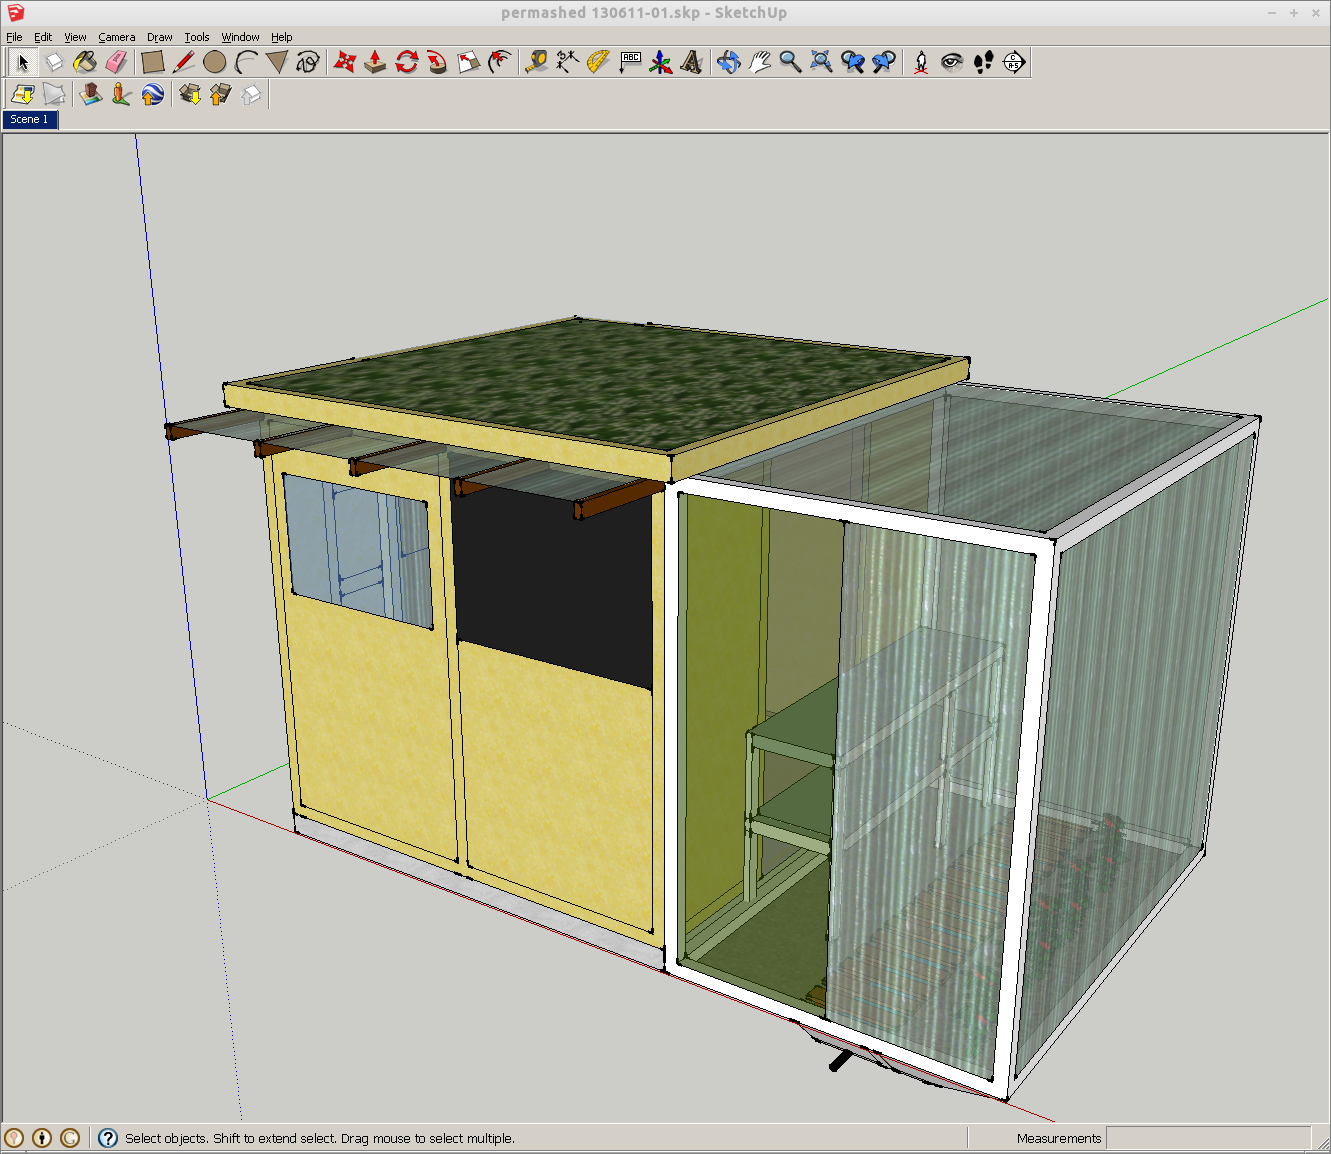
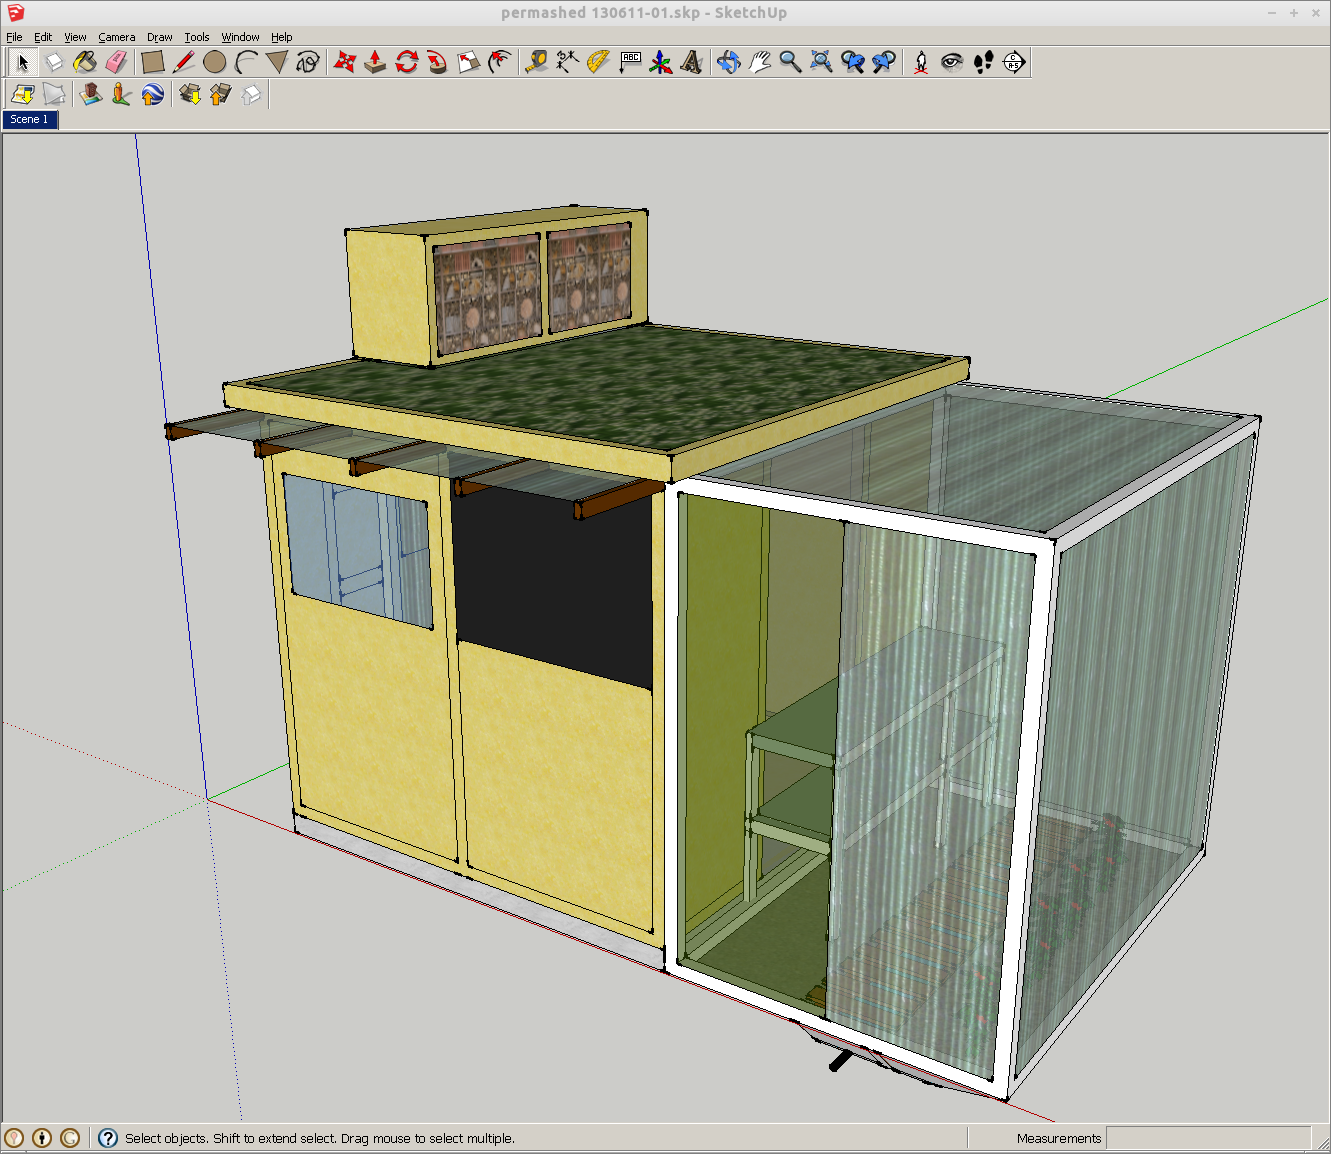
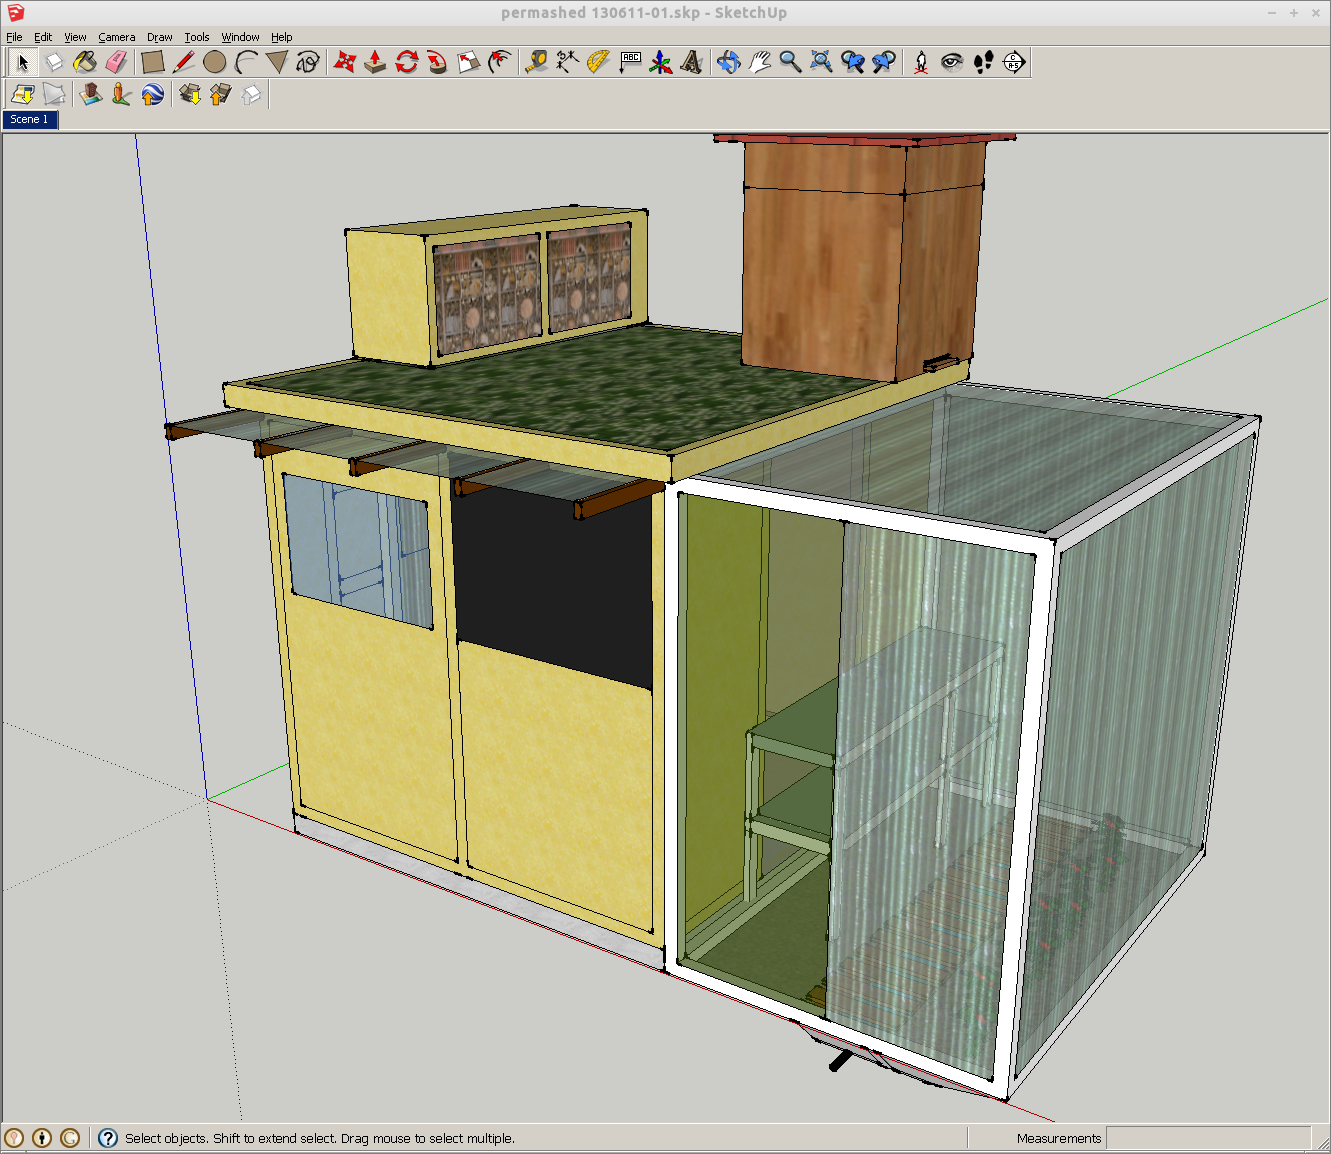
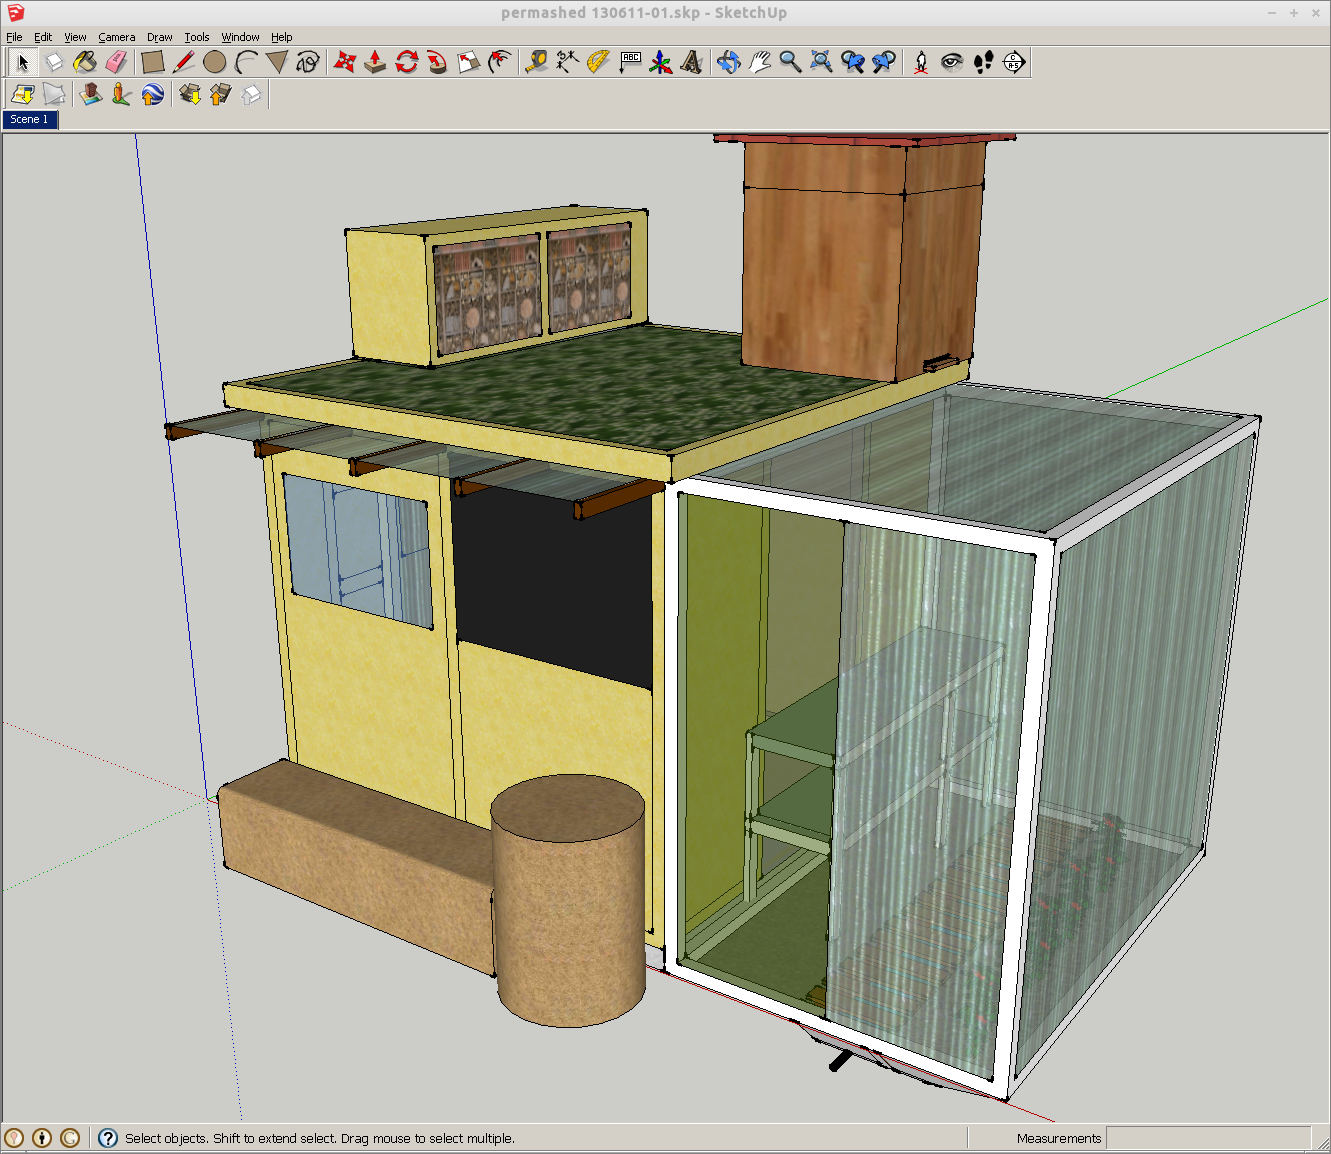
Apply — Principles & Final Design
Permaculture principles were applied to synthesise the evaluation into a coherent design. The final structure combines: main shed (storage), attached greenhouse with water reservoir in its foundation wall, seating shelter, green/brown roof, insect hotel, beehive space, rocket stove and heated bench, and solar PV.
-
4
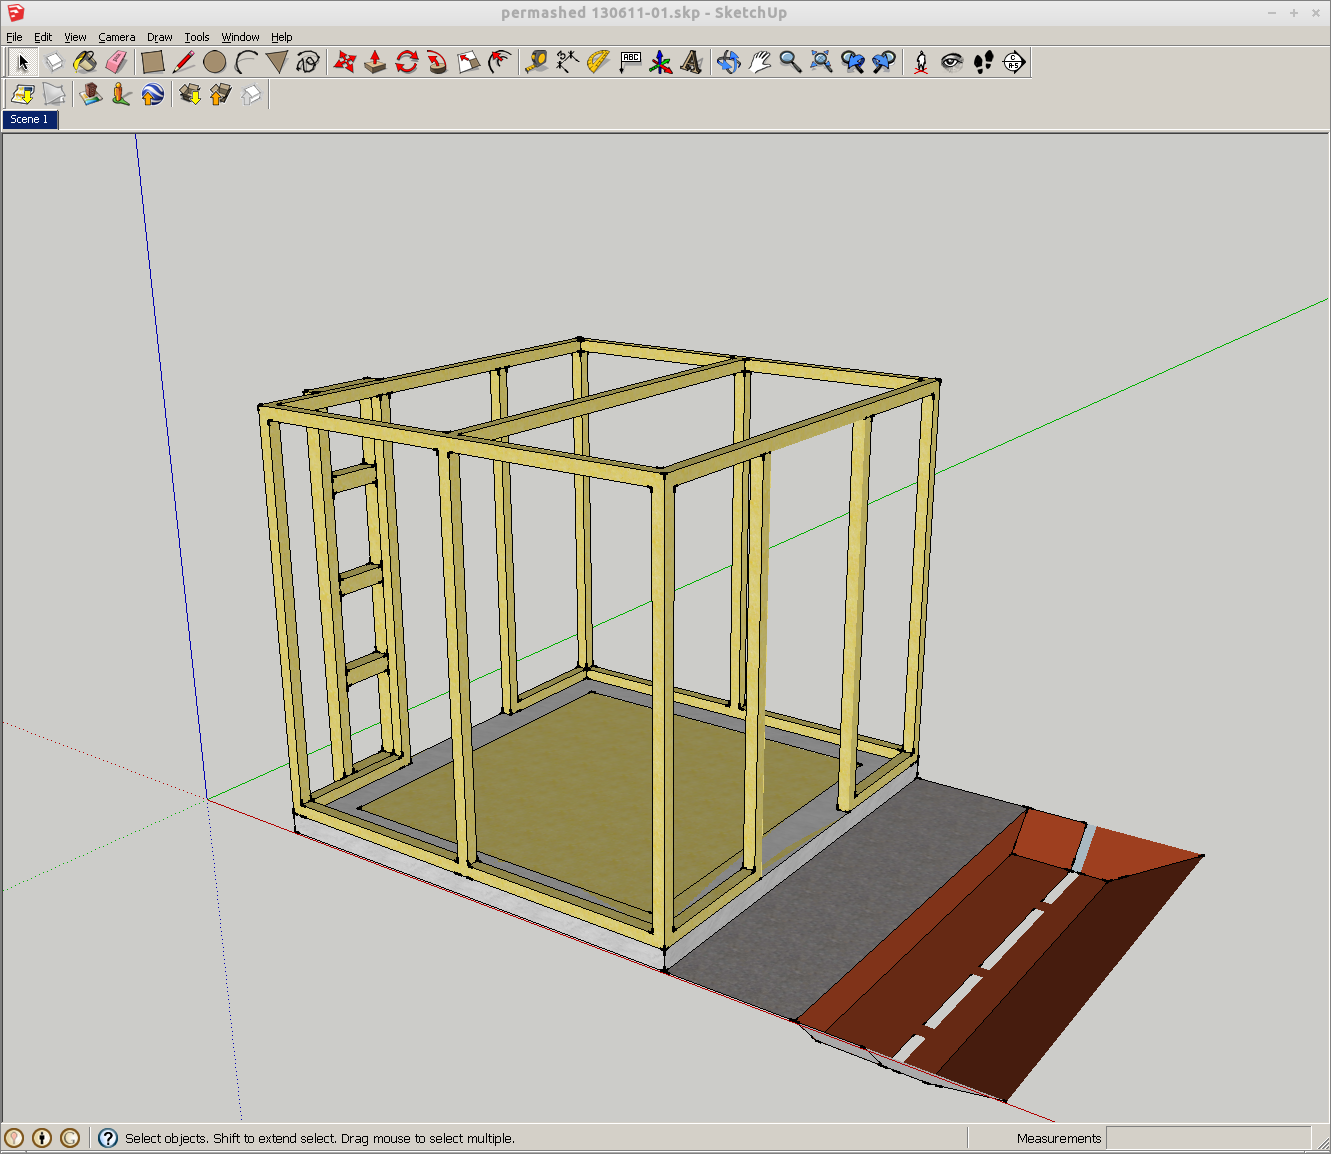
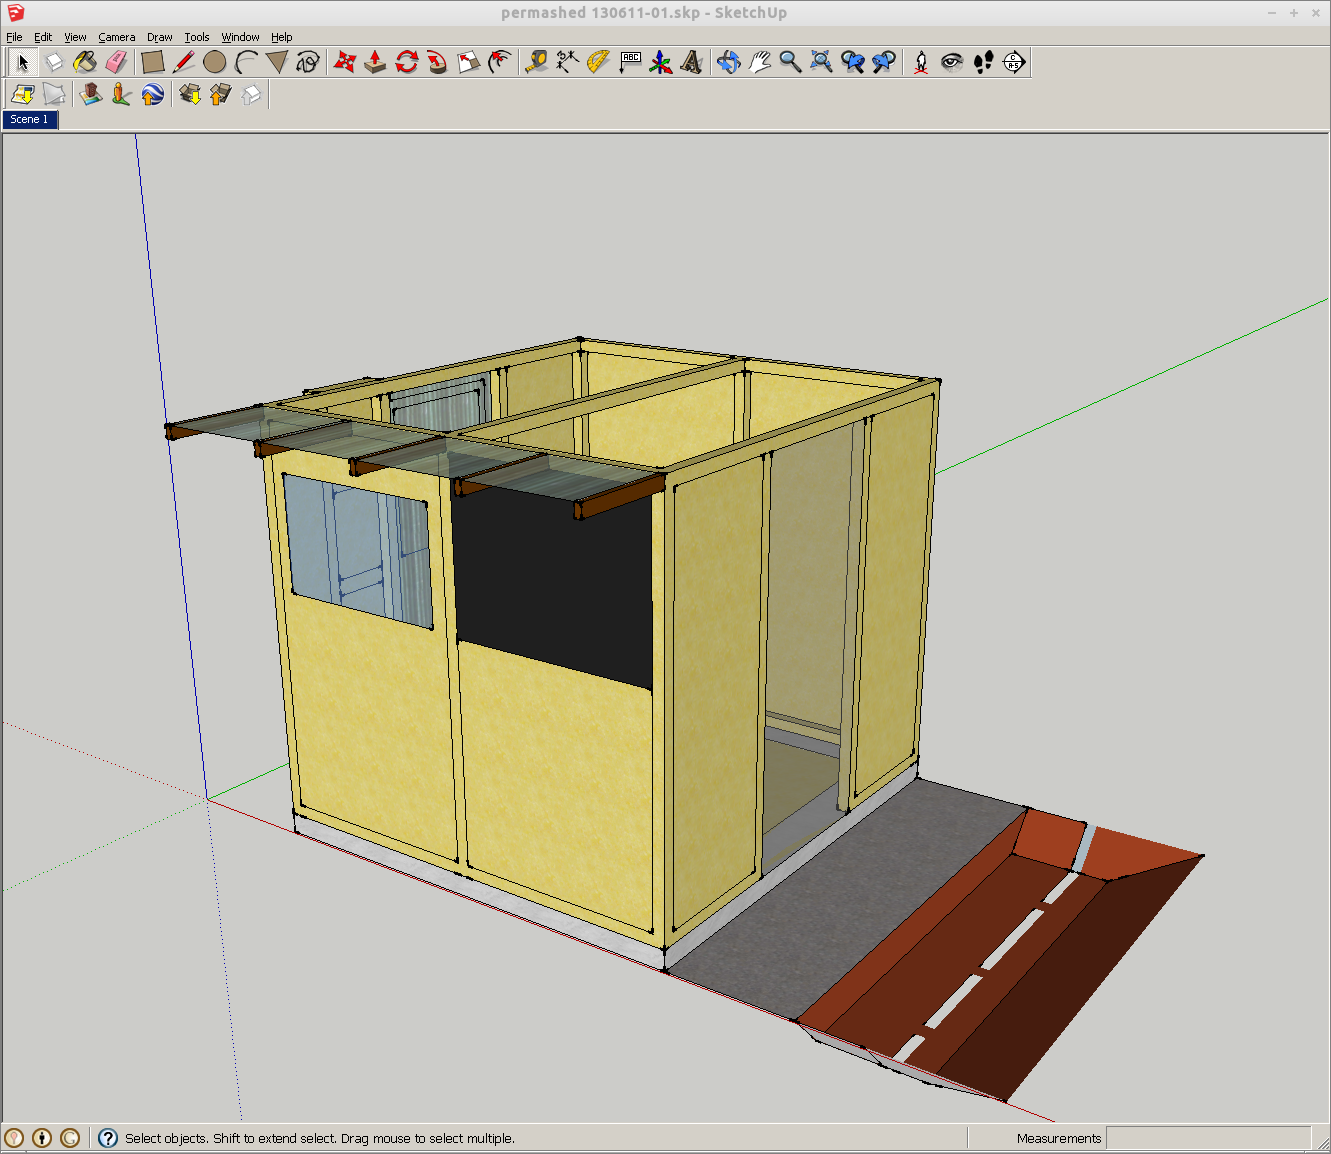
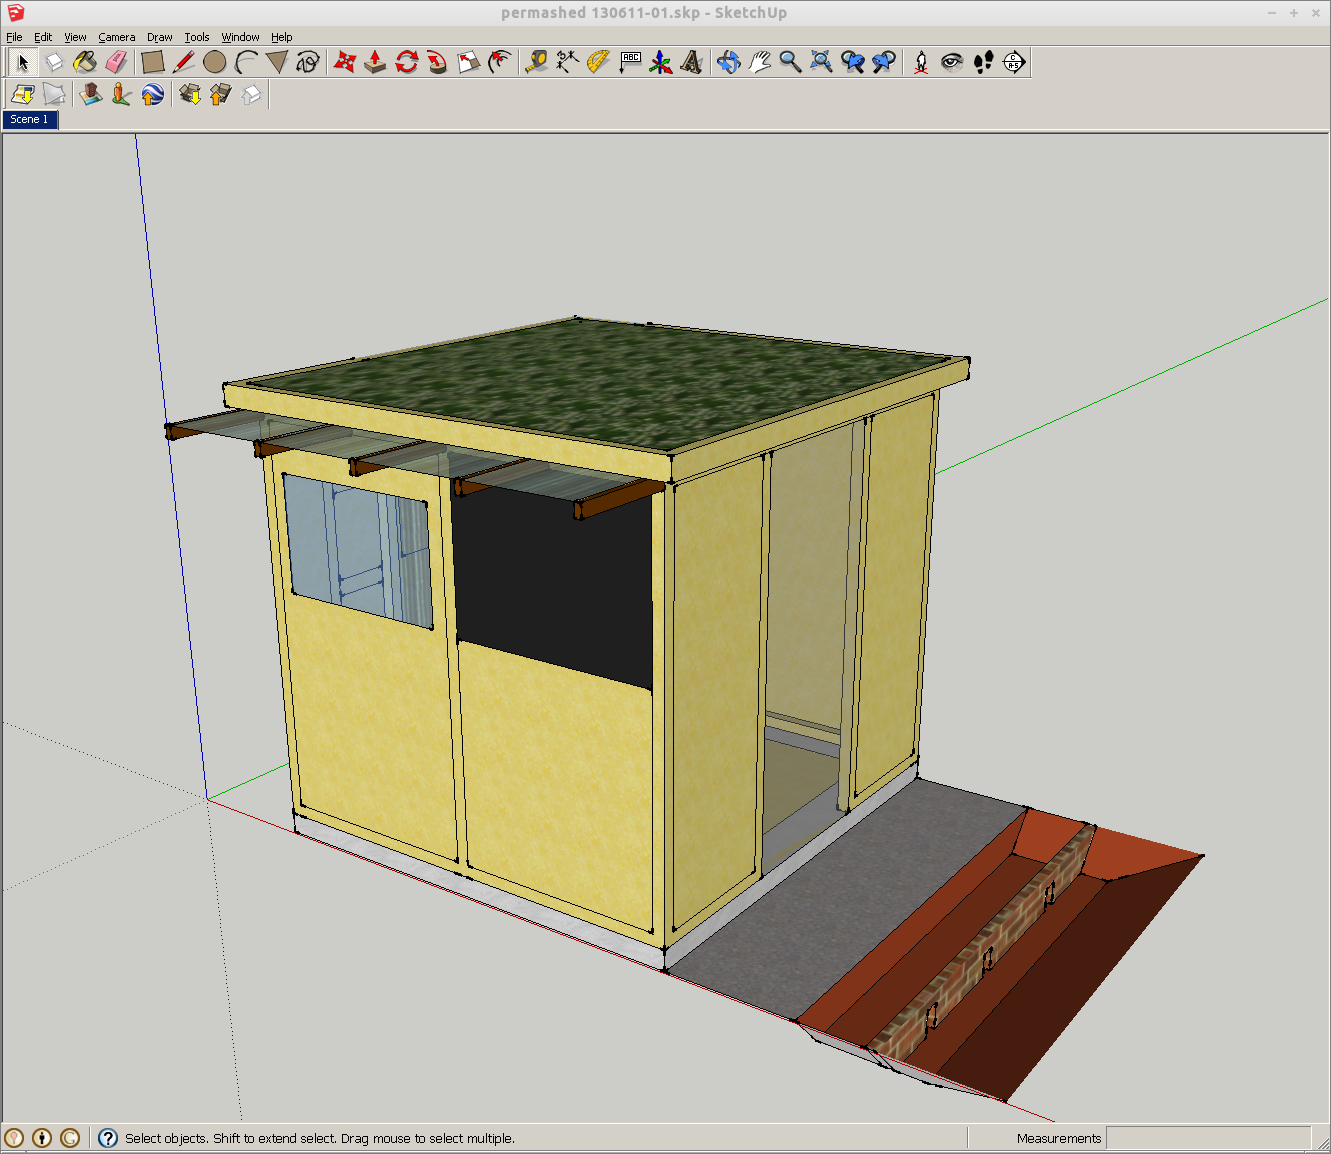
Plan & Build — Expected vs. Actual
Because the build relied on recycled materials and volunteer help, a rigid plan was never realistic. The build sequence below shows the intended order; reality required flexibility and adaptation.


Demolition
Demolition took one day; cleanup took a week. The rotten wood went directly into a new hugel bed — waste from one system becoming a resource for another.
Time-lapse of the old shed being dismantled
Reflections & Outcomes
The design process was creative and enjoyable — the challenge of combining multiple functions in a single structure produced an unexpectedly rich brief. The beehive was an unplanned addition that emerged naturally from the design process itself. Almost all materials were recycled; the original shed's walls were reused in the new structure.
The build is still in progress. A full evaluation will follow on completion.